Important: Your theme must be installed and applied to the site before uploading the demo content.
Much as an Umbraco starter kit, BindTuning themes are packed with demo content files that are easy to set up and are a great jump start for building content areas for your website.
Download the .zip file
Log in to your account at bindtuning.com. Inside your admin dashboard click on My Themes and select the theme.
Inside the theme's page, under documentation, click on the demo content link to download the .zip file.
Unzip the file
Before uploading the demo content into your website you will need to unzip the file. The file name is theme.UMB7.DemoContent.zip.
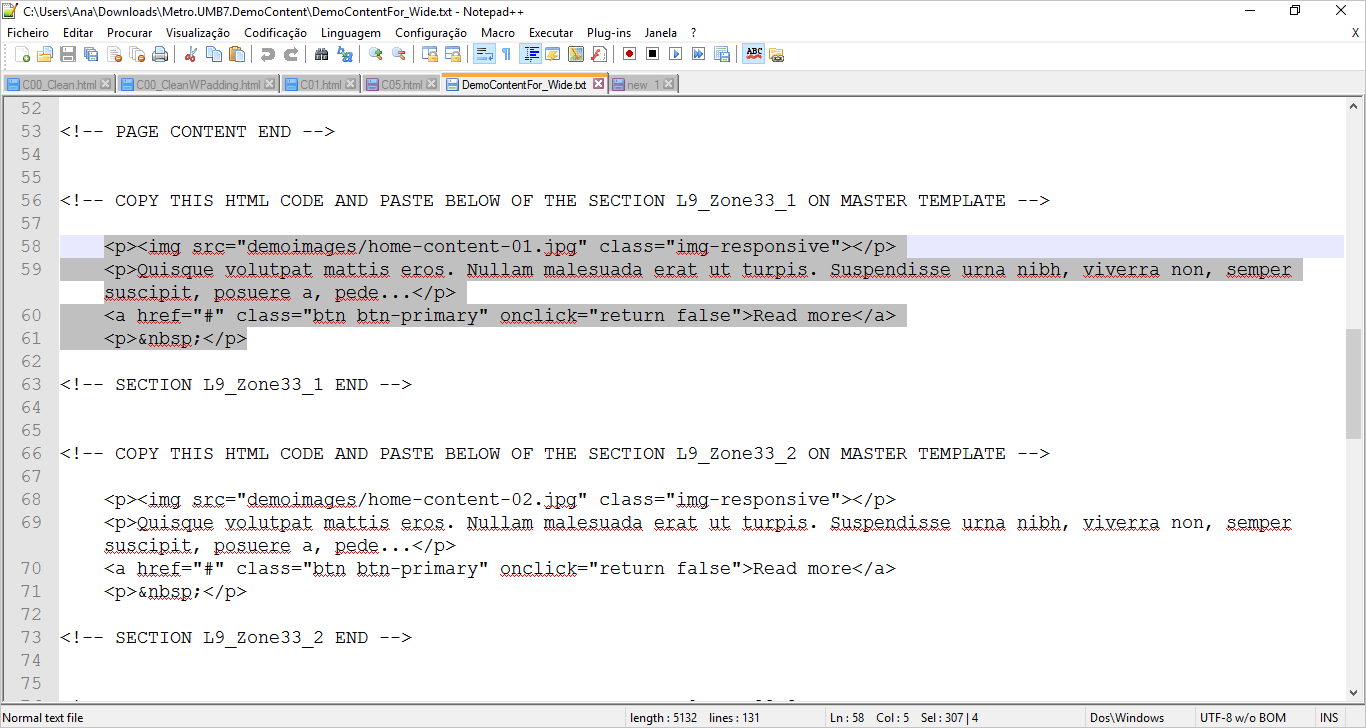
After unzipping the file, open the demo content file(.txt). If you are using the Wide Master Template, then open the corresponding demo content file. In this case is DemoContentfor_Wide.txt.
Inside the .txt file you will find content for different zones, including the slider zone, footer, social zone, etc. If you want to add a Slider zone check our KB article on Adding a slider in Umbraco).
Copy the html code for the content you want to add and move on to uploading the demo content.
Uploading the demo content
Which Umbraco version are you working with?
Version 7 (only MVC)
Follow these steps to add the demo content:
- Login to your Umbraco admin area (http://yourURL/umbraco);
-
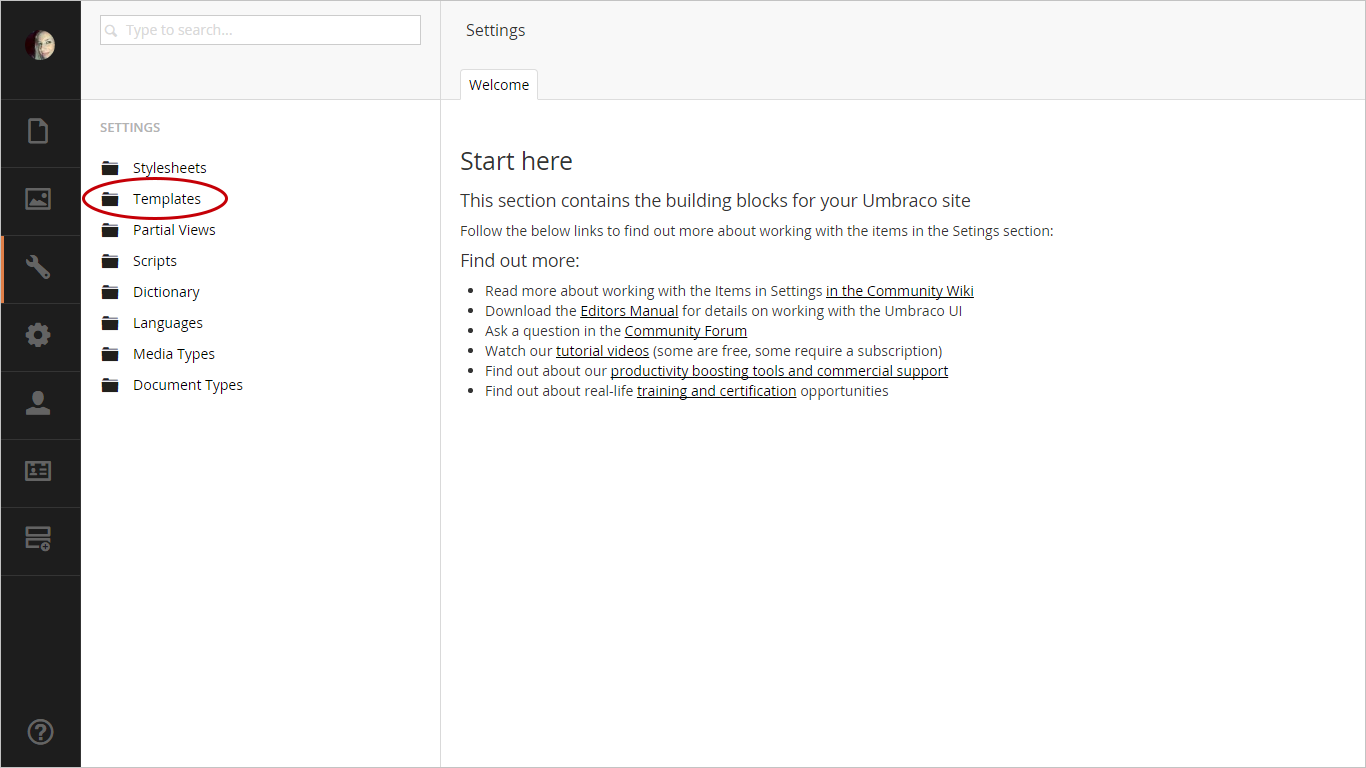
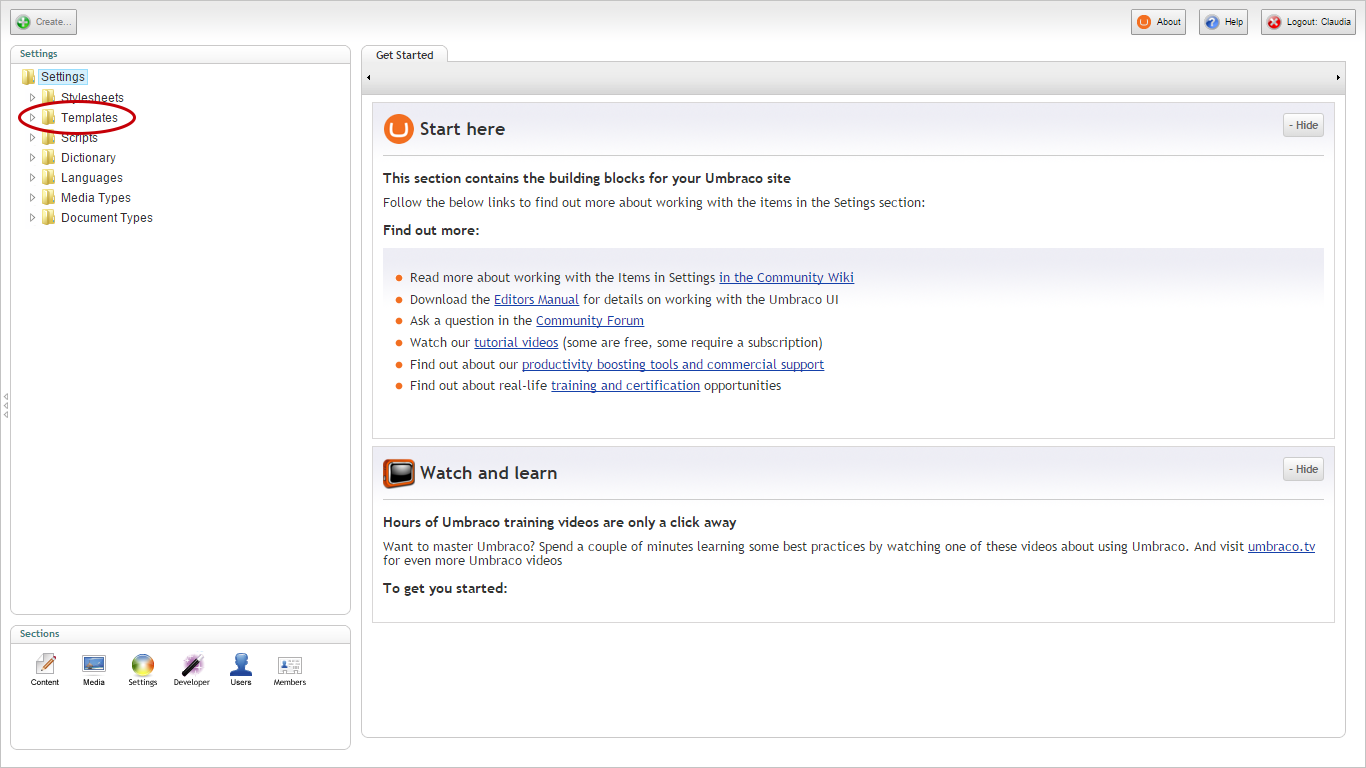
Click on the Settings section and open the Templates folder;
 3. Select the master template where you want to add the demo content.
4. On the Template tab, paste the html code from the txt file;
5. Enter the zones where you want to place the content;
3. Select the master template where you want to add the demo content.
4. On the Template tab, paste the html code from the txt file;
5. Enter the zones where you want to place the content;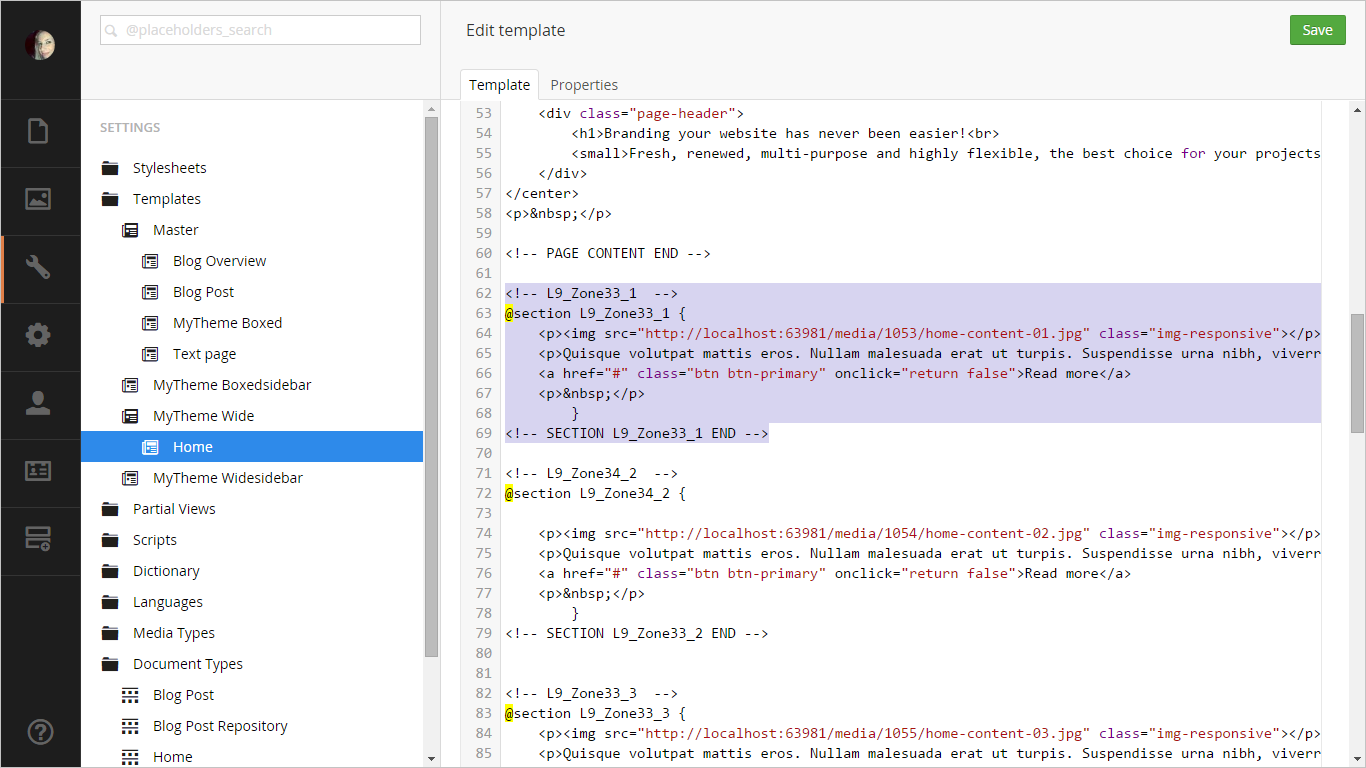
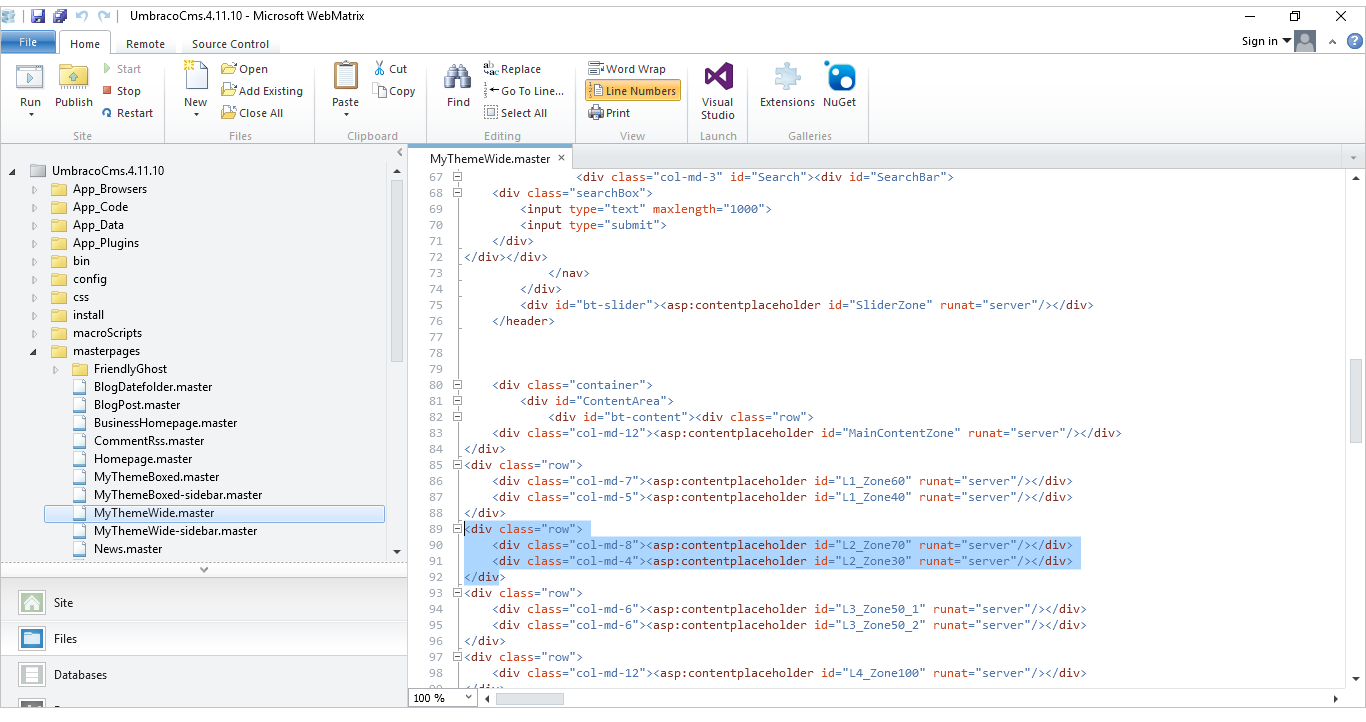
Note: You can see which zones does your Master Template and theme include. Just open the Views and the Grid folder. Now click on the the Master that you are currently using. Once you have opened the file you will find all the zones that your theme and Master include on the code.
 5.Click Save; All done!
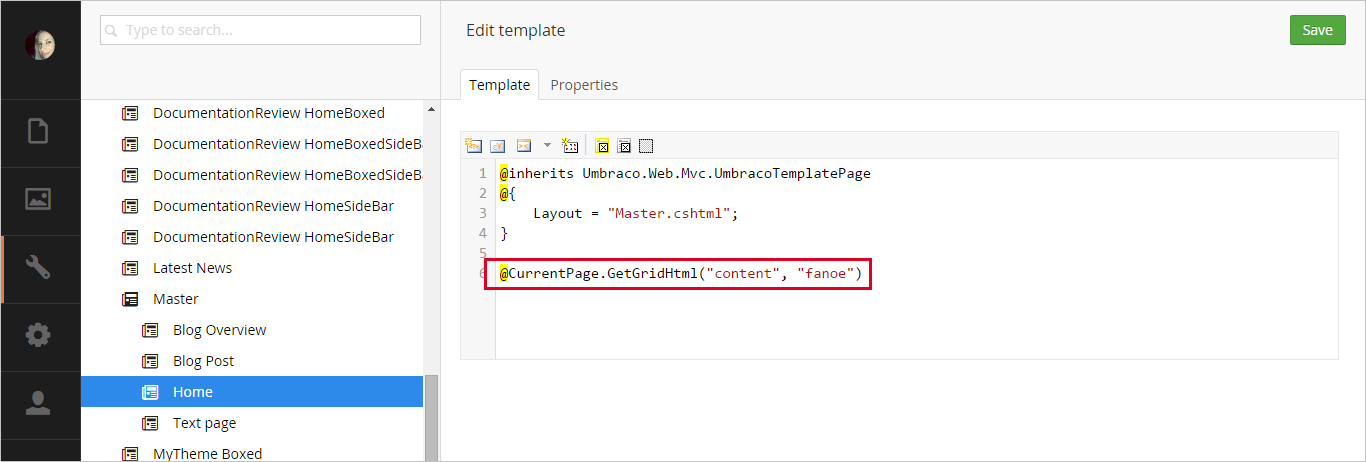
Note: If you only want to use BindTuning demo content on a particular Master, and the master is still inheriting content from one of Umbraco's starter kits, like Fanoe, delete the tag @CurrentPage.GetGridHtml("content", "fanoe").
Version 4-6
Follow these steps to add the demo content:
- Login to your Umbraco admin area (http://yourURL/umbraco);
-
Click on the Settings section and open the Templates folder;
 3. Select the master template where you want to add the demo content.
4. Paste the code from the txt file;
5. **Enter the following tags wrapping the code you just pasted:
3. Select the master template where you want to add the demo content.
4. Paste the code from the txt file;
5. **Enter the following tags wrapping the code you just pasted: <asp:content ContentPlaceHolderID="*zonewhereyouareplacingthecontent*" runat="server"></asp:content>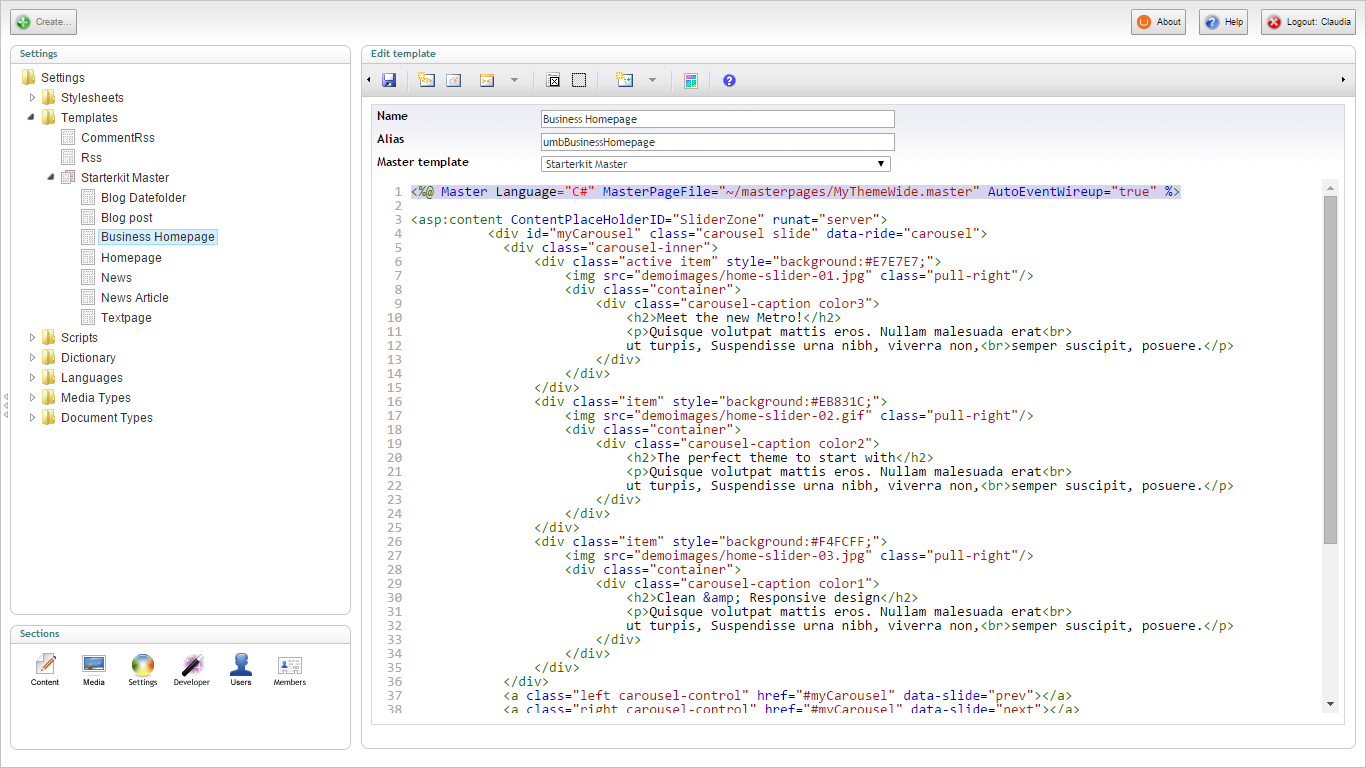
Note: You can see which zones does your Master Template and theme include. Just open the Views and the Grid folder. Now click on the the Master that you are currently using. Once you have opened the file you will find all the zones that your theme and Master include on the code.
 5.Click Save; All done!
Uploading the demo images
If you are adding demo content that happens to include images sources on the code, you will need to upload those images into Umbraco.
Important: All the images provided in the demo content folder are for demo purposes only.
Which Umbraco version are you working with:
Version 7 (only MVC)
- Go your Umbraco admin area;
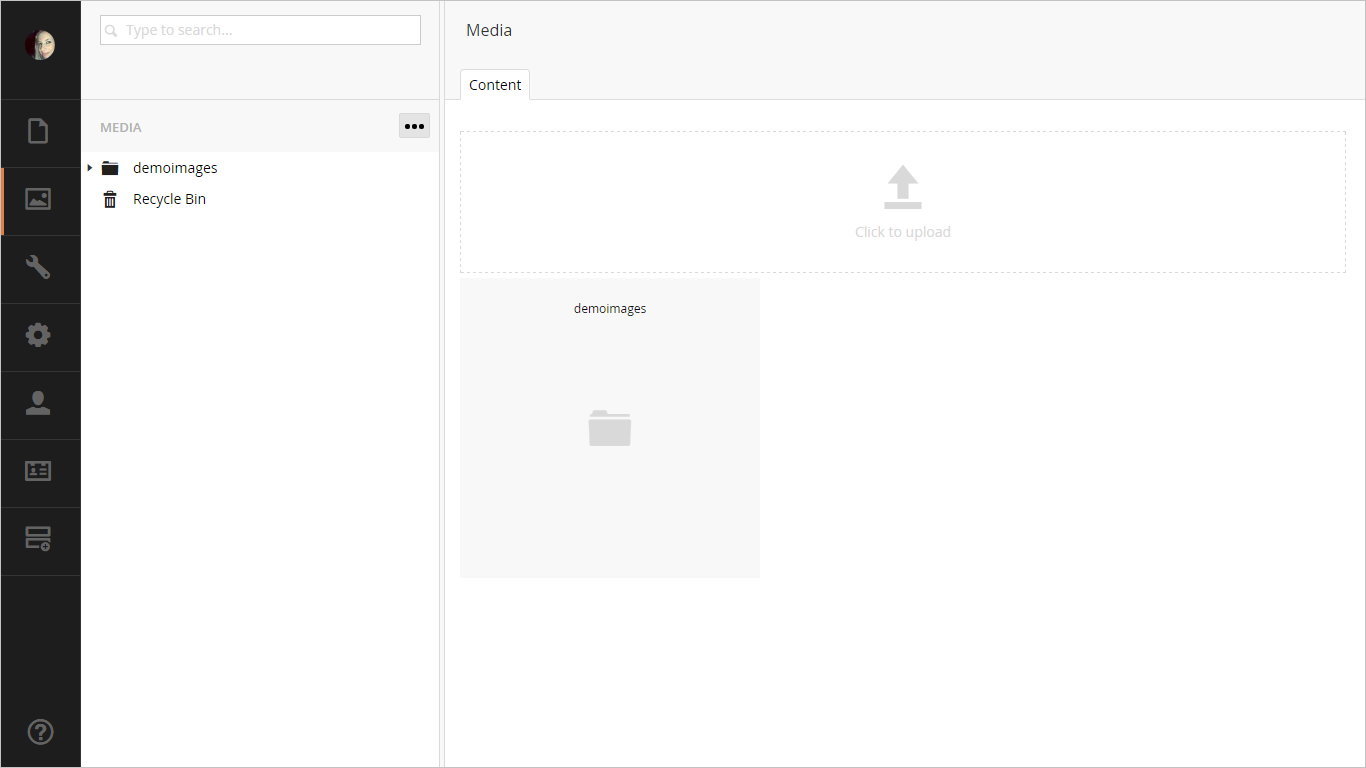
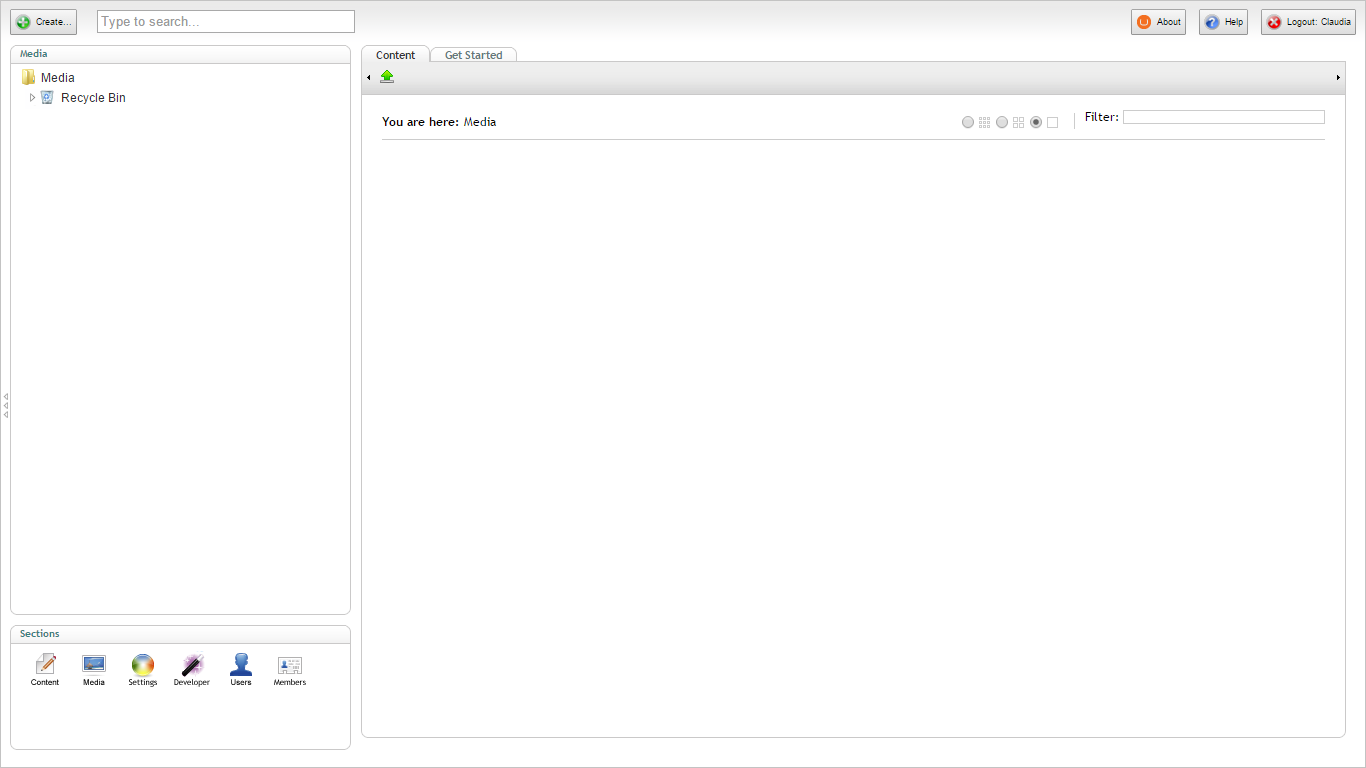
- Click on the Media section;
- Hover over the Media node and you’ll see three dots ... , click on the dots to see the menu;
- Click on the folder icon, to create a folder for your images;
- Give it a name and click *Save*;
-
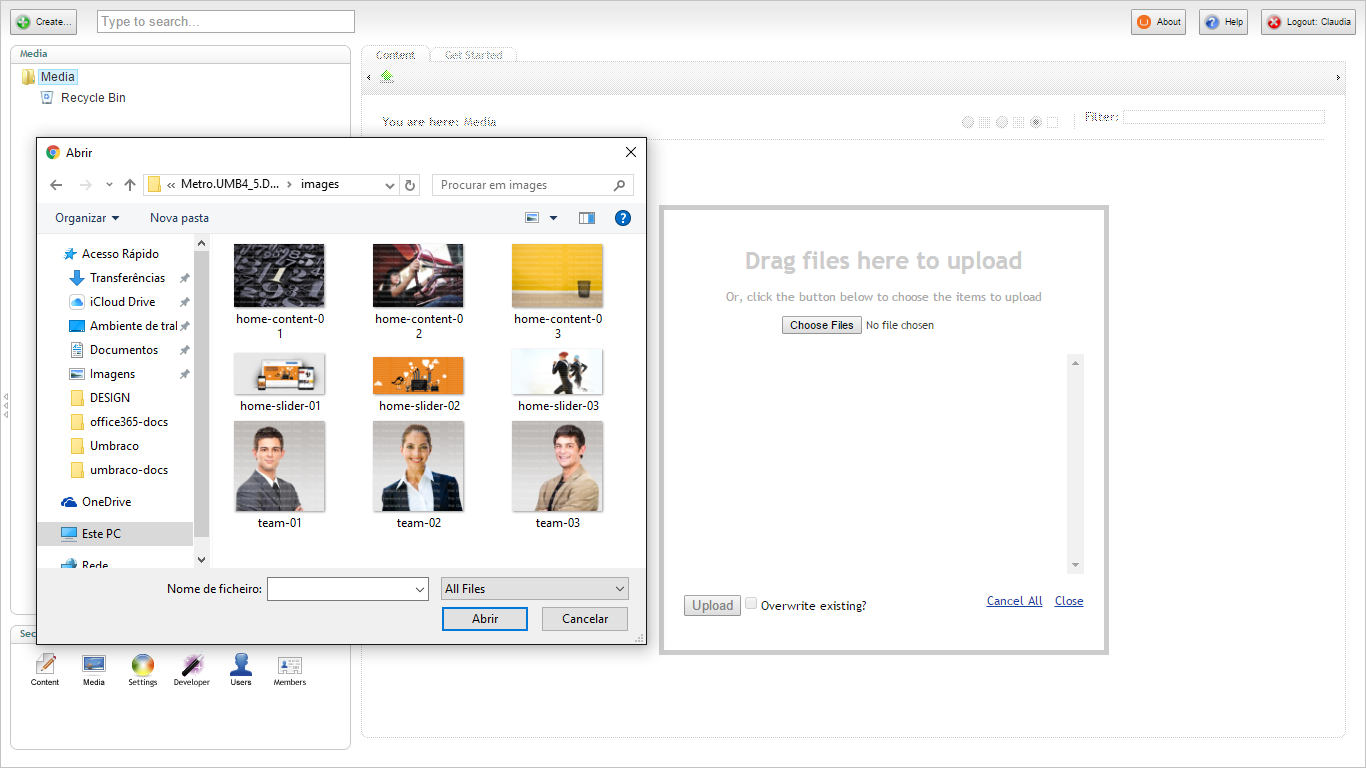
Click on *Click to upload*;
 4. Open the theme.UMB7.DemoContent file;
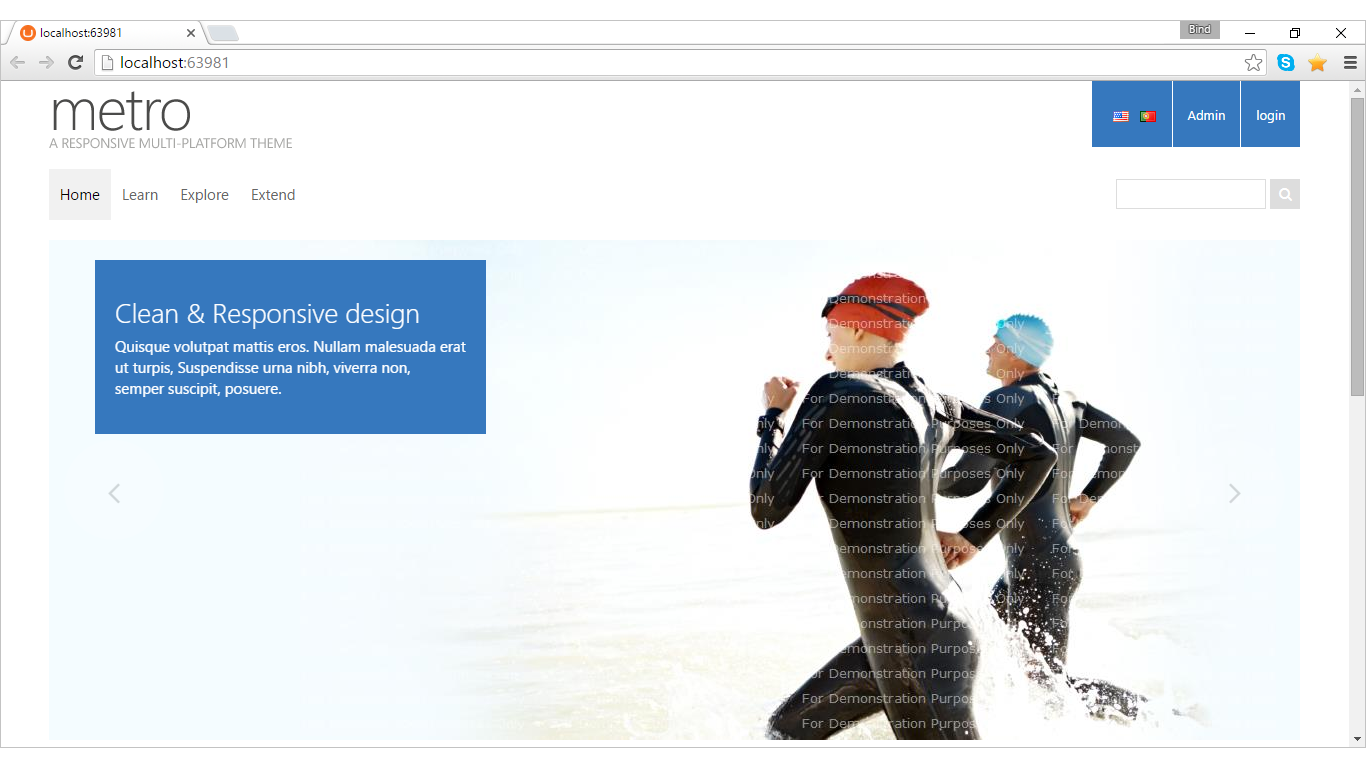
2. Open the images folder. There you will find all the images that you were able to see on the theme's live preview at bindtuning.com;
4. Open the theme.UMB7.DemoContent file;
2. Open the images folder. There you will find all the images that you were able to see on the theme's live preview at bindtuning.com;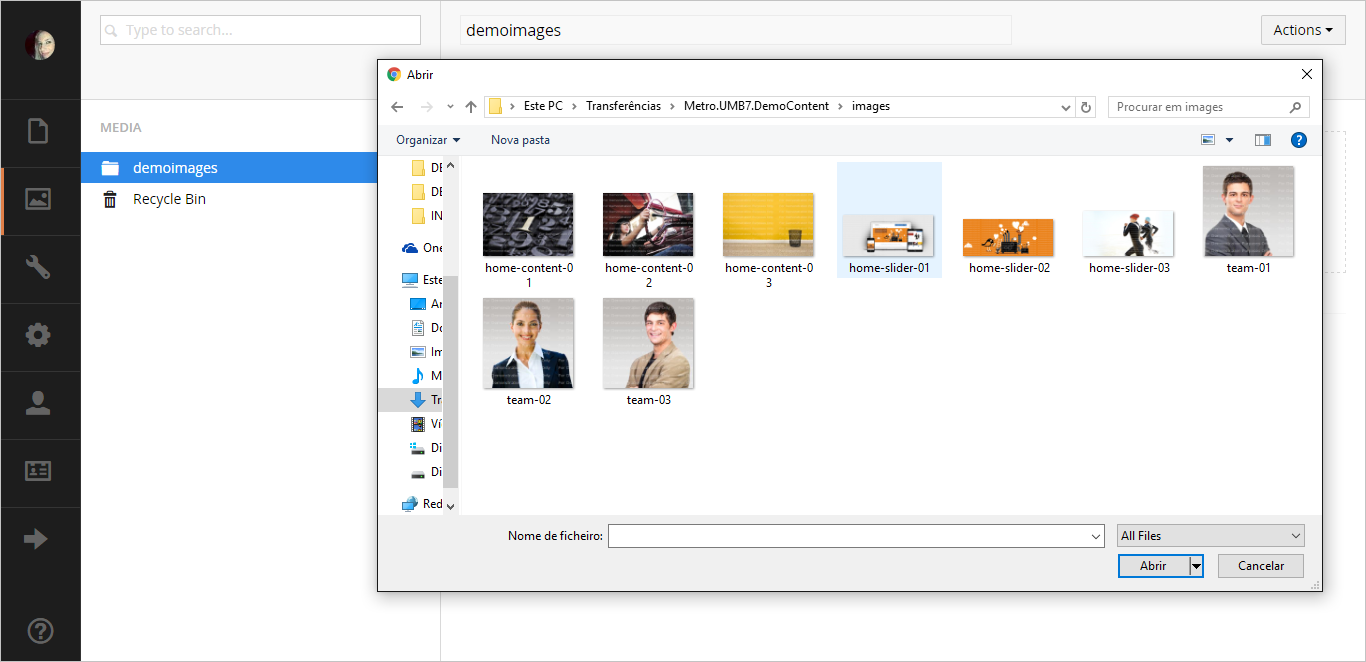 3. Select the images you want to upload to your folder;
4. Still inside your Umbraco admin area, go to the Settings section;
5. Open the Templates folder and open the master where you want to include the images;
6. Replace the source on the code.
7. Click Save.
3. Select the images you want to upload to your folder;
4. Still inside your Umbraco admin area, go to the Settings section;
5. Open the Templates folder and open the master where you want to include the images;
6. Replace the source on the code.
7. Click Save.
Looking good! On to the next chapter.
Version 4-6
- Go your Umbraco admin area;
-
Click on the Media section;
-
Click on the upload icon;
-
Open the theme.UMB7.DemoContent file and open the images folder. There you will find all the images that you were able to see on the theme's live preview at bindtuning.com;
 4. Still inside your Umbraco admin area, go to the Settings section;
5. Open the Templates folder and open the master where you want to include the images;
6. Replace the source on the code.
7. Click Save.
4. Still inside your Umbraco admin area, go to the Settings section;
5. Open the Templates folder and open the master where you want to include the images;
6. Replace the source on the code.
7. Click Save.